How to: (Very) Basic Product Photography

One of my favorite parts of the job I do is getting to know so many entrepreneurs who have turn their passions into a source of income. But they, like me, many times realize too late that owning a business is more than just making a thing or offering a service, and getting payed for it. The number of side-tasks, which en up becoming main tasks and consuming most of your time, is endless: taxes, book-keeping, marketing, networking, packaging... it makes you want to quit before you even start! And I have heard so many times: "outsource anything that you hate, or that you are not good at". Well, sure, but if can you afford that when you are just starting? How do you break the cycle?

I will share two pieces of wisdom with you here: 1) you CAN do it all, and 2) you can afford more than you think. If you are interested in how to hire us to photograph your products, skip all the way down there ↓ to 2) .

1) YOU CAN DO IT ALL

It doesn't mean you can do it all perfectly, or that you have the time or energy to do it all, and so in the beginning you will have to be okay with many short nights and a very simplified version of what you would like your business to look like. In the spirit of helping you with that, I want to share with you the one thing I am good at and that I will never outsource myself: making images (of your products).

You can find many tutorials out there on this topic, but I am going to give you the very, very basic steps, the ones that will allow you to take images of your products NOW, without expensive purchases or teaching yourself Photoshop.

Basic set up with a seamless background, for big products.

Basic set up with a seamless background, for big products.

What you need:

# a spot with a window with good light (preferably right next to a corner), and either:
     - a white wall and a piece of white laminate or foam board (if product weight allows)
     - white paper (preferably a roll)
# masking tape
# a (second) piece of white foam board
# a decent camera (your cell phone will probably do!)
# time to plan
# a step-stool (optional)

I will describe the steps to take when photographing a small object (for example, jewelry), and give you some tips for each step. If you are photographing something bigger (for example, furniture) you will need a bigger space and bigger paper (like a backdrop paper to create a seamless background).

Step One: Plan

* Decide what you are going to photograph, when (choose the time when the light is best at your chosen location).
* Make a list of products to be photographed and allocate at least 30 minutes to each product.
* Make a list of any prep the product needs: do you need to clean it? Iron it? Make it? Add the estimated "prep time" to each product.
* Make a list of any props (besides the above-mentioned ones) that you may need, and if you need extra time for getting these in order, add that to the "prep time" as well. For example: do you need hangers and a bar to hang that handmade shirt from?
* Make sure your phone (or camera) has enough storage and battery life.

Step Two: (on the day of the shooting) Gather Everything You'll Need

This may sound trivial but please don't skip it. If you, like me, like cooking from scratch, you know that there is a world of difference between gathering all your ingredients before you start following the recipe, and helter-skelter-ly getting them one at a time as you follow the directions. Set up for success!

Step Three: Set up Your Product

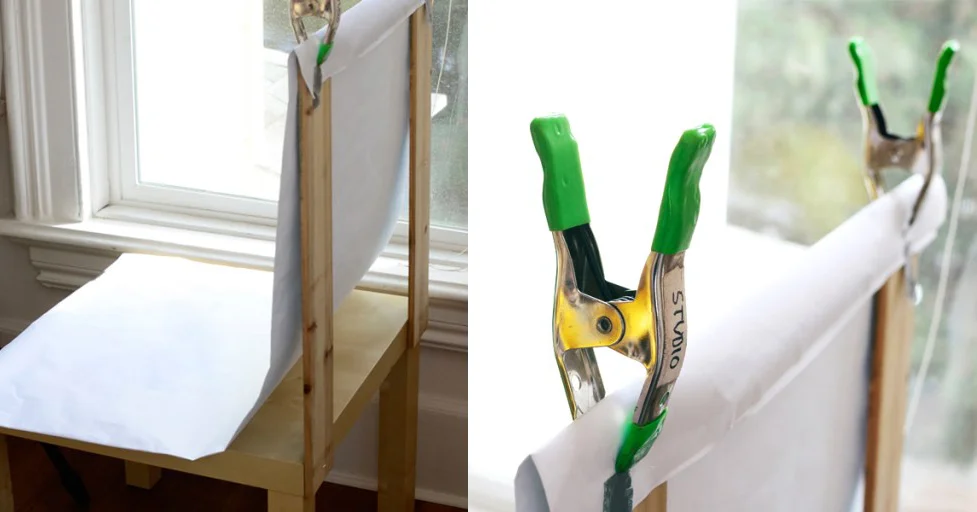
Placing a seamless on a chair for small objects. Clamps work great!

Placing a seamless on a chair for small objects. Clamps work great!

A foam board piece opposite the window acts as a reflector.

A foam board piece opposite the window acts as a reflector.

* For best results, you want to have the window to the side of your product (see image next to "what you need".)
* If
     - you are going for the foam board and wall approach, place one piece of foam board in the corner on the ground, or on top of the appropriate surface (use a small table for a knitted hat, a chair for shoes...)
     - you are going for a seamless background, set it up as far as you can. You can tape it to the wall or the back of the chair, depending on the size of the product you are photographing (for this last one, clamps may work better, if you have them.)
* If you are photographing something that hangs, like dangle-y earrings, think of ways you can suspend it in front of the wall or paper: two pencil holders with a string between them, pins on a foam board placed vertically against the wall... many options!
* Place the other piece of foam board opposite the window, so the light bounces back and hits the product from both sides. If you are having trouble keeping it vertical, prop it against the chair or score it with an Exacto and fold it to create a book-like reflector that stands on its own. The larger your product the biggest piece of foam board you'll need. If you find at the last minute that you need to go bigger and you don't have a reflector the right size in hand, hang a white sheet high enough to send light back to your product: this is the bright side of the photography nightmare of having a client show up with a bright green shirt...

* Finally (and this is one of the most important steps), make sure you diffuse the light that's coming in the window. You can use a big piece of paper and tape it over it, or use sheer curtains. This will take care of any "features" the window may have (like cut-ups) and will give you an even, soft light. Even if your paper is not big enough to cover the whole window, just make sure that no direct, bright sunlight is hitting your product.

Make sure you cover the windows, so no direct sunlight hits your product.

Make sure you cover the windows, so no direct sunlight hits your product.

Step Four: Photograph!

Take as many shots as you can think of, and then some. If you are trying to experiment with a DSLR, feel free to read my tutorial from last year. Take photos of the highest resolution possible: you can always compress them. But if you are using your phone, it will probably take care of adjusting settings to give you the best results.

Take a close-up, rotate your product to see it from different angles (a tripod/cell phone gadget comes in handy here, so the only thing moving is the product), take a shot from above (use a step stool, and be safe!)... it is better to have too many images than not enough: you will not want to have to set this up all over again for one image you later decide you are missing.

Step Five: Practice and Improve

There are a lot of things to learn and improve. You can get a "Lazy Susan" to place small objects on, build a light box, start playing with how to take good Social Media images by adding little objects or props around your product, or invite a friend over and venture into photographing your product being modeled. In the meantime, this basic set-up will give you great results. Try them!

2) YOU CAN AFFORD MORE THAN YOU THINK!

The trick here is: while you are paying somebody else to do what you hate/are not great at, you need to be hustling at the things you love/are good at, and turning those tasks and hours into money you can use to pay somebody else to do what you hate/are not great at. Makes sense?

I know, for some, even this simple procedure may be too much. So starting this month, Lightfolly is offering product photography services for our local entrepreneurs. We will meet for a vision session, where you will tell us about your brand, your products, and your story. You will decide if you need us to photograph one product, or a whole line, whether you want just product shots or social media and model images too, and we'll work together to take your products to the next level.

Here is what you get with our basic package:

* 1 product shot, on transparent background
* 1 product shot, on a background of your choice
* 1 High Resolution styled image for social media

Product photography image for Social Media-PS2.jpg
Product photography image for Social Media-SMI2.jpg

All for $49 (Packages including model shots start at $75). But we want you to experience the ease of mind of working with you before you commit, so we are offering AN INTRODUCTORY PRICE OF $29 for our basic package ($55 for packages including model shots) if you hire us BY FEBRUARY 2nd.

The examples shown here are for the beautiful, locally made jewelry created by Nadia Kaliszewski, from Big Hollow Designs. Because the Social Media shot is High Resolution, you can crop it in several different ways to use it in various different post, as well as add whatever filters complement your brand. And yes, that is her in the photo below, but you don't have to model your own products if you don't want to: we'll take care of that! Contact us through our page or give us a call at 307-703-8118 to start discussing you investing in your company.

ModelShot-BohemebyLightfolly-1-LowResWM.jpg

How to: 5 Spring Wardrobe Tips

Believe it or not, it's that time of the year again when you start dreaming of longer days and warmer activities. A little bit more than a month until spring. And although you still need a thick coat and gloves to venture outside, I know you are already dreaming of stripping it all and give way to tank tops, skirts, and sandals.

Last year I wrote a pretty extensive tutorial on how to revamp your wardrobe and come up with a closet you love for spring, so you could be ready when those sales hit the internet. I hope you followed it and got to enjoy it last spring, and if not, that you will take a day for yourself to get it done this year. Because I am about to give you 5 tips to add to the fabulous wardrobe you already (or are about to) have!

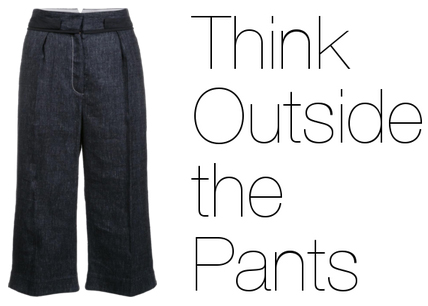
Maybe it is still a bit chilly for skirts, so what to do when you are a bit tired of those jeans, khakis, and cords you've been wearing all winter long? This may be the year for a bit more adventure with your bottoms. Have you heard of "culottes"? They are cropped pants with legs so wide that when standing with your feet together it looks like you have a skirt on! How about "gauchos"? Those loose, mid-calf pants that are as comfortable as yoga pants but a lot more stylish and sophisticated. Find what works for you and upgrade your 2016 wardrobe with one purchase.


What about getting some pieces that may be too summery to wear just yet, but that can be used now with the right complementary pieces? I am envisioning a one-piece swimsuit (I just recently discovered the beauty of this overlooked summer essential!) in my wardrobe, which I will wear with a pair of palazzos (or even the gauchos I'll be getting to upgrade my bottoms). Yes, it will need another layer in Wyoming, but that's allowed (see #3). Another similar alternative would be a minidress that you'll get to wear by itself in the summer months, but that you can get away with wearing as a long top/tunic with either leggings or jeans underneath.


I just bought 4 spring blouses that I can't wait to have a chance to wear on their own. The tricky bit is, they are sleeveless, and that will not go well for a while given our seasons. Or lack thereof. The way I go about circumventing this little issue is by layering. I say goodbye to my winter sweaters and instead I add a chambray half way open and an unbuttoned cardigan over that. A skinny belt keeps the whole ensemble together. Yes, sometimes I need a parka over all that, but when I get to wherever I'm going I can take it off and I am left with a beautifully put together layered look that it's a million light years from those boring sweaters. And if it warms up half-way through the day, like it has lately, I'm covered.


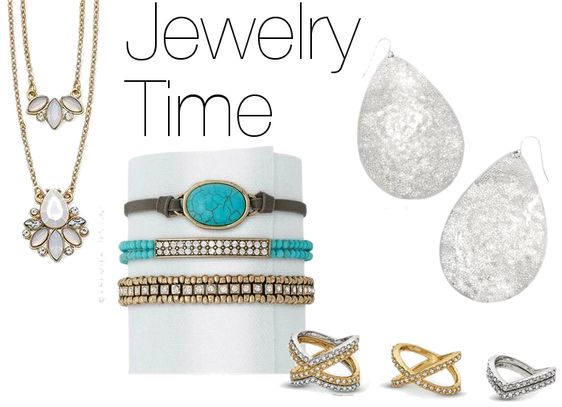
If you are not getting new pieces this spring, don't despair: there is still plenty you can do to uplift your wardrobe, and this tip is one I personally am thankful for every spring: don't forget the jewelry! When the weather starts warming up I transition pretty quickly into shedding layers and showing some skin. However, I seem to have a harder time EVERY YEAR with getting earings and rings back on. I am an avid scarf wearer, which means that it is tricky to rock a necklace in the winter months, and gloves do their part against rings and bracelets. But once they are back in the storage bins, I have to remind myself that I already own plenty of bling to bring back out, it's just a matter of remembering it's there.


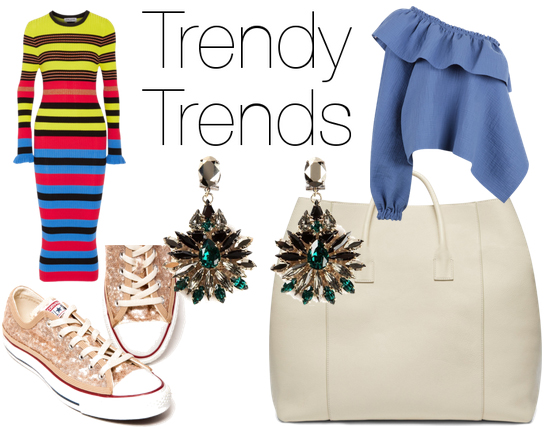
Last but not least, there are the trends. Every year, the powers of fashion dictate what's in and what's out, and if you are like me you couldn't care less what they think when planning your wardrobe. However, they are impossible to miss, even in a place like Laramie, when the people who do follow the academy awards and other events start wearing those trends, perhaps without even knowing they are trending. So do you want in? And maybe don't think you can afford it, or you have no idea where to start? Here are 5 trends for this spring that you can jump right on shopping virtually anywhere, including the local thrift store which we know has vintage aplenty: One shoulder tops, specially blouses and dresses; oversized bags, for the farmer's market and a night out in the town; oversized earrings, which I'm sure you already own!; iridescence, specially sequins and specially shades like pink and blue; vibrant stripes, preferably broad and on knit dresses.

And that's all I have for you. Go raid your own closet and get ready for the warmer days that are to come!


How to: stop fearing your DSLR

So, you have a DSLR. Awesome. Mostly everybody does nowadays, but don’t feel down just yet: you will rise above the masses if you can actually stop using your DSLR as a point-and-shoot, and venture into the manual modes. I mean, nothing wrong with letting a computer make the decisions for you, but wouldn’t it feel good to be able to put that investment to work, and take your photos one step further? The automatic modes will still be there for a challenging environment or a day when you would rather just click, without thinking too much.

There is no way I can teach you all your camera can do for you: I would have to summarize your manual’s 100+ pages in one post. So I will make this super easy, yet useful: even if you have no idea how a camera works, once you read this post you will be able to try at least one of the manual modes that most intermediate cameras have to offer.

I will tell you about the 4 most common manual modes; think of these as baby steps toward full manual control:

Program Mode (P)

Shutter Priority Mode (S in Nikon/Olympus/Sony or Tv in Canon)

Aperture Priority Mode (A in Nikon/Olympus/Sony or Av in Canon)

Full Manual Mode (M)

Start with P and move in this order as you become familiar with the different settings and what they do. This way, you don't have to become a master photographer as soon as you turn the dial.

There are three main pillars that will affect your final image: ISO, shutter speed, and aperture. What are these things, you wonder? These are settings that will control different characteristics of your images. Let’s start with:

ISO: how sensitive your camera is to the light available. If there is a lot of light, you don’t need a lot of sensitivity. When you don’t need a lot of sensitivity, the ISO number you’ll read is low. If the number is low, the sensor in your camera doesn’t need to struggle and you’ll get a sharp image. As you go up in ISO, the image will get grainier and grainier as the camera struggles to sense with the little light available. Always choose the lowest ISO you can get away with.

At a higher ISO, the nail looks grainy when zoomed in, which makes it look less defined and out of focus. (ISO 1600, f/3.5, 1/250 seconds)

At a higher ISO, the nail looks grainy when zoomed in, which makes it look less defined and out of focus. (ISO 1600, f/3.5, 1/250 seconds)

At a lower ISO the nail looks crisp, although darker because the camera is less sensitive. (ISO 200, f/3.5, 1/50 seconds)

At a lower ISO the nail looks crisp, although darker because the camera is less sensitive. (ISO 200, f/3.5, 1/50 seconds)

If you got that, you are ready to try the first manual mode, Program. This is almost like using the AUTO mode, but you will be able to control the ISO, which is helpful when you don’t want to use flash. In a low-light situation, the AUTO mode will simply pop-up the flash, but what if you don’t want to take a photo with flash and your subject is moving? Try Program, and choose a higher ISO.

Go give it a try and come back.

Ready to keep going? For the next mode you’ll need to understand:

Shutter speed: how quickly the “camera” opens and closes again. If it opens and closes slowly, a lot of light goes in. If it opens and closes slowly, the number you will read will be large, as it is measured in seconds: it takes longer for the “camera” to open and close again. If the shutter speed is large, your camera will record any motion (of the subject or the camera) as motion blur, since it will be recording during all that time that it takes the “camera” to open and close. So, a shutter speed of 5 is good to photograph a waterfall, keeping the camera on a tripod (the water will look as it is moving and the rest will be still), while you may want to choose a shutter speed of 1/250 to “freeze” a child running in the sun.

This pendulum was swinging in front of the camera. It looks blurry when attempting to capture it at a shutter speed that was not fast enough. (ISO 400, f/32, 1/40 seconds)

This pendulum was swinging in front of the camera. It looks blurry when attempting to capture it at a shutter speed that was not fast enough. (ISO 400, f/32, 1/40 seconds)

Choosing a faster shutter speed takes care of the problem. Notice that a faster shutter speed allows less light in, so the image is darker. (ISO 400, f/32, 1/125 seconds)

Choosing a faster shutter speed takes care of the problem. Notice that a faster shutter speed allows less light in, so the image is darker. (ISO 400, f/32, 1/125 seconds)

Do you think you can try Shutter Priority Mode now? Of course you can. In this mode, you decide how long the shutter is open for, all else is automatic. Now is where you want to start to pay attention, since your camera will adjust the ISO automatically: if you choose a very fast shutter speed but you are in low light conditions (and if a very small aperture (which you’ll learn about next) is not an option because of your lens), the camera will have to choose a high ISO, and you risk having grainy images.

So, go practice. I suggest you choose a couple of different situations (motion vs still) at different light levels, and see what changing the shutter speed does to your images. I’ll be here when you come back.

Not too bad, huh? Now, remember I mentioned aperture up there? And how some lenses cannot go to very low apertures? Read along to find out why this is important.

Aperture: how much your “camera” opens, which depends on the lens. If it opens a lot, a lot of light goes in. If it opens a lot, the number that you’ll read (called f-stop) will be small and written under an “f”. If the f-stop is small, you will have a sharp image at the point where you are focusing, and the rest will be blurry (called narrow "depth of field” or "DoF"). So, an f-stop of f/3 is good for portraits where the subject jumps out of a blurry background, while if you are taking a landscape you may want to choose an f/32 to have it all be in focus.

Although the background is busy, you can blur it and have your subject pop by choosing a low f-stop (ISO 400, f/2.8, 1/125 seconds)

Although the background is busy, you can blur it and have your subject pop by choosing a low f-stop (ISO 400, f/2.8, 1/125 seconds)

When the f-stop value is increased (the aperture is closed), the background becomes more defined. Notice that there is less light going in if the aperture is smaller, so the image is darker. (ISO 400, f/7.1, 1/30 seconds)

When the f-stop value is increased (the aperture is closed), the background becomes more defined. Notice that there is less light going in if the aperture is smaller, so the image is darker. (ISO 400, f/7.1, 1/30 seconds)

Aperture Priority Mode is not that different from Shutter Priority Mode. You just control a different setting (the size of the lens opening, instead of the speed at which it opens), and let the camera adjust the rest. Modify your f-stop to get different depth of fields, keeping an eye on what ISO and shutter speeds the camera is choosing, so you avoid images that are blurry or grainy.

One more practice session; you are almost done.

Back? Great. So now you are ready for Full Manual Mode. You guessed it: this mode allows you to control it all. It shows a scale of exposure on your viewfinder, and you will want to be in the middle for “correct” exposure: if you are to the right of your scale, your photo will be overexposed (bright) and if you are to the left, it will be underexposed (dark). Sometimes these results are desired, depending on how bright or dark the “correctly exposed” photo looks. Play with the settings and see what happens. Overwhelmed? Try what I do; I set my setting in the following order:

1) Choose the lowest ISO

2) Select the f-stop I want for my desired depth of field

3) Adjust the shutter speed for correct exposure

If my shutter speed goes below 1/30 (the lowest number at which I can hold the camera steady):

4) Increase the ISO (or in counted occasions, decrease the f-stop)

I tend to shoot at low f-stops, since I love narrow depth of fields, so I can rarely increase the aperture if what I am looking for is more light.

And you are done! Up your game a little or a lot, and get your camera to give you back what you payed for it. Now go shoot some killer images!